
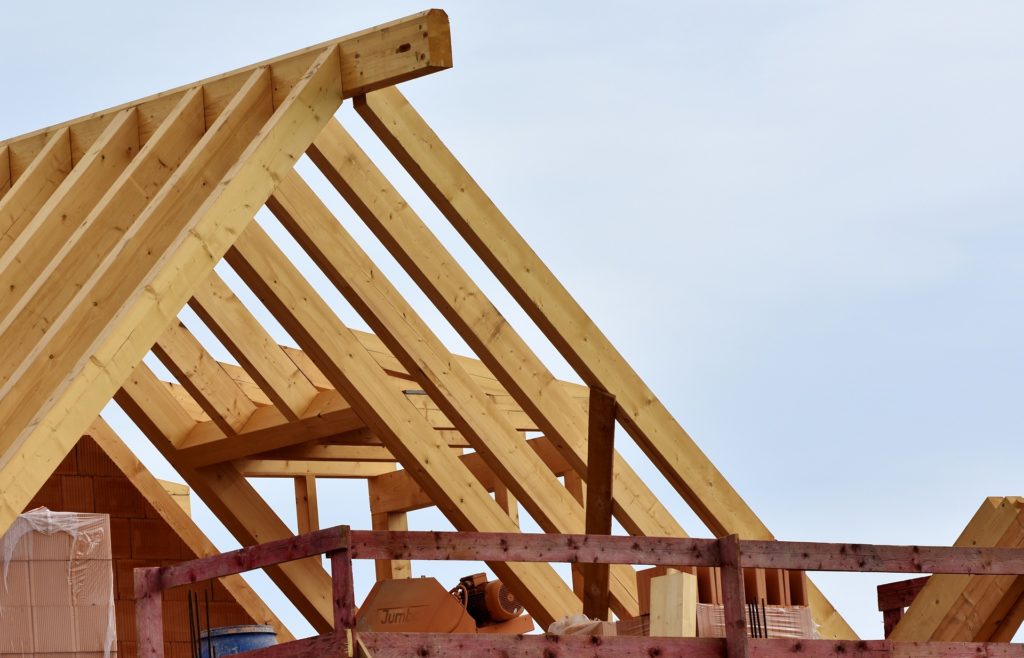
Building a shed roof means more than cutting two boards to meet at a peak. The framing must carry the design loads, the connections must resist wind, and the roofing layers must drain water away from the shed. Decide how those parts work together before buying lumber or choosing shingles.
This guide covers the sequence from planning to a weather-tight roof. It is not a structural design or a universal cutting list. Use drawings suited to your shed, site and local requirements; ask a qualified designer or building professional about missing structural details. For the whole project, start with our shed construction guide.
Affiliate disclosure: We may earn a commission if you buy through links to shed plans on this page.
1. Choose the roof shape, pitch and covering together
A gable roof has two slopes meeting at a ridge. A single-slope roof drains in one direction. Either can suit a storage shed, but they need different framing and flashing details. Consider permitted building height, door clearance, nearby buildings, runoff and the appearance you want.
Pitch describes rise over horizontal run: a 4:12 roof rises 4 inches for every 12 inches of run. The covering must be approved for that pitch. For example, GAF’s shingle slope guidance sets a 2:12 minimum for its asphalt shingles, with special underlayment requirements on low slopes. That is a product limitation, not a recommendation to make every shed roof 2:12.
Metal panels and membrane systems have their own slope, deck, seam and fastening requirements. Do not assume any metal panel works on a nearly flat roof. Compare shed roofing materials before finalizing the framing.
Shed roof pitch: what the numbers mean
Shed roof pitch describes how far the roof rises for every 12 inches of horizontal run. Pitch is not the same as the angle in degrees, although both measurements describe the same slope. Choose pitch together with the roof covering, snow and wind design, wall height, drainage path and permitted building height. There is no single pitch that is best for every shed.
Roof-pitch terms
- Rise: the vertical change in height.
- Run: the horizontal distance, not the sloping rafter length.
- Pitch ratio: rise per 12 inches of run, such as 4:12.
- Angle: slope measured in degrees.
- Rafter length: the diagonal distance from the support toward the ridge or high wall, before allowances for overhangs, ridge details and bearing cuts.
Shed roof pitch calculator
Use these formulas for preliminary geometry. They do not size the rafters, approve a roof covering or replace structural drawings.
- Rise = horizontal run × pitch ÷ 12
- Pitch = rise ÷ horizontal run × 12
- Angle in degrees = arctangent(rise ÷ horizontal run)
- Basic sloping length = √(rise² + run²)
Worked example: One side of a gable roof has a 6-foot horizontal run, or 72 inches. At a 4:12 pitch, the rise is 72 × 4 ÷ 12 = 24 inches. The basic sloping length is √(72² + 24²), or about 75.9 inches. That does not include the overhang, ridge allowance, birdsmouth or connection detail.
Common shed roof pitch examples
| Pitch | Rise per 12 in. | Approx. angle | Rafter factor* | Planning note |
|---|---|---|---|---|
| 2:12 | 2 in. | 9.5° | 1.014 | Low slope; many products require special details or do not permit it. |
| 3:12 | 3 in. | 14.0° | 1.031 | Confirm the exact covering, underlayment and fastening instructions. |
| 4:12 | 4 in. | 18.4° | 1.054 | A common example, but not a universal requirement. |
| 6:12 | 6 in. | 26.6° | 1.118 | More rise and roof area; plan safe access and overall height. |
*Multiply horizontal run by the factor for the basic sloping length. Add overhangs and apply the approved ridge and bearing details separately.
What is the minimum pitch for a shed roof?
The minimum shed roof pitch is the lowest slope permitted by the complete roofing assembly. It varies by covering, underlayment, seam or lap design, deck requirements and manufacturer. Local rules and site conditions can require something different. A roof at the product minimum has less margin for construction errors, slow drainage, debris and ice.
Lean-to shed roof pitch
A lean-to roof uses the full building width as its horizontal run, so the required difference between the high and low walls can be substantial. For example, a 10-foot-wide lean-to has a 120-inch run. At 3:12, the height difference is 30 inches. At 4:12, it is 40 inches. Add the wall and roof assembly details before checking the final building height.
For an attached lean-to, the roof-to-wall connection and flashing are critical. Do not fasten only to siding or rely on sealant as the primary water-control detail. See the lean-to shed construction guide for related planning issues.
Shed roof pitch questions
What is a typical shed roof pitch?
Sheds use many pitches. A number such as 4:12 may be common in examples, but it is not a universal standard. The correct choice depends on the covering, structure, climate, height and design.
Can I use asphalt shingles on a 2:12 shed roof?
Only when the exact shingle manufacturer permits that slope and every required low-slope detail is followed. Many asphalt-shingle instructions treat 2:12 through less than 4:12 as a special application.
Is a steeper shed roof always better?
No. A steeper roof generally drains faster but costs more, creates a higher structure and can be harder to work on safely. It still needs correct framing, connections, flashing and roofing installation.
Does changing pitch change rafter length?
Yes. For the same horizontal run, a steeper pitch increases rise and sloping length. It can also change ridge height, material quantities, overhang geometry and connection details.
2. Confirm the design and organize materials
Before construction, confirm site-specific snow and wind requirements and any permits or inspections with your local building department. The plans should identify lumber species and grade, member sizes and spacing, roof loads, sheathing, overhang supports, bracing and connections down to the foundation. A heavier roof covering can change the design.
- Framing: specified rafters or trusses, ridge components, ties, blocking and overhang framing.
- Deck: rated roof sheathing and any specified edge supports.
- Weatherproofing: compatible underlayment, flashing, edge metal, roof covering, caps and vent components.
- Connections: the specified structural fasteners and connectors, with suitable corrosion protection.
- Access and tools: safe working platforms, a suitable fall-protection plan, measuring tools, saws and eye/hearing protection.
Measure the actual wall layout, not just the advertised shed size. The foundation, floor and walls need to be square, level as applicable, and properly braced before roof erection.
3. Understand rafters, trusses and ridge support
Conventional rafters and engineered trusses are different systems. With a nonstructural ridge board, opposing rafters commonly need properly designed lower ties to resist outward thrust. A structural ridge beam carries roof load through its supports and needs an appropriate load path below. A small plate at the peak does not turn one system into the other.
Rafter ties, collar ties and hurricane connectors perform different jobs; they are not interchangeable. The American Wood Council explains the distinction between collar ties and rafter ties. Use our shed truss guide to understand truss planning, or the 12×12 shed rafter guide for a worked rafter-geometry example.
4. Lay out and test the first rafter
For a site-cut rafter roof, take the pitch, bearing positions, ridge allowance and overhang from the design. Mark and test one pattern before copying it. A correctly cut pattern saves time; copying an incorrect pattern repeats the error across the entire roof.
Plumb cuts and bearing cuts
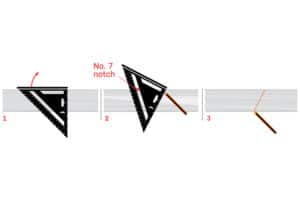
The top plumb cut must suit the specified ridge connection. Its location depends on the real run and ridge detail, not only a nominal shed width. The existing illustration shows a layout concept; it does not establish your cutting dimensions.
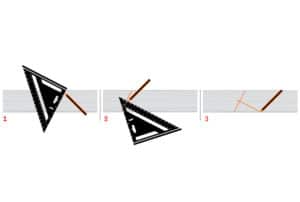
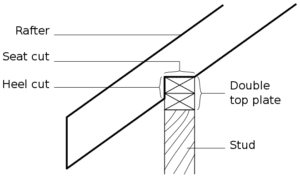
A birdsmouth forms a bearing seat where the design calls for one. Its depth and location must satisfy the applicable notching limits and required bearing. Do not deepen the notch until a rafter happens to fit, or apply this detail to a manufactured truss. Verify the seat, remaining member depth and tail length before cutting the rest.
Use a layout jig only for an approved assembly
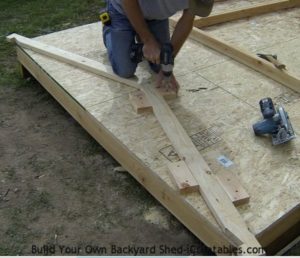
A flat layout surface can help check dimensions and repeat an approved assembly. Do not assume the floor edges establish the roof bearings or use an arbitrary half-inch overhang. Mark the actual support lines and overhang dimensions from the drawings.
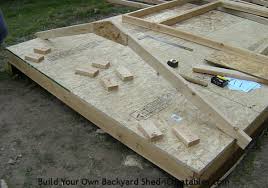
A jig holds pieces in position; it does not determine their structural capacity. Any site-built truss or gusseted assembly needs a complete design identifying members, panel material, gusset dimensions and the fastening schedule.
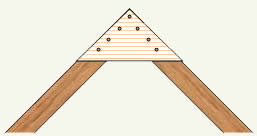
Important: The legacy gusset illustration is not a construction specification. Do not attach arbitrary scrap plywood or OSB to two rafters and assume you have a safe roof assembly. Have missing connection details resolved before proceeding.
5. Erect, connect and brace the roof safely
Plan lifting and temporary support before moving framing into place. Keep wall bracing in place and install temporary and permanent roof bracing as specified. Check spacing, alignment and bearing as work progresses. Do not remove temporary bracing simply because the last rafter is standing.
Install roof-to-wall connections using the exact fasteners specified for the connector and substrate. Ordinary deck screws are not automatic substitutes. Complete the required load path through the walls and shed anchoring, not just the roof clips.
A small shed still presents a serious fall hazard. Do not climb unbraced framing or work on wet, icy or windy roof surfaces. A harness alone is not a complete fall-protection system. If you cannot arrange suitable access, anchorage, equipment and trained help, hire a roofing professional. OSHA’s residential fall-protection guidance is a useful safety reference for contractors.
6. Install the specified roof sheathing
Use roof-rated panels with the thickness and span rating required by the design. Check that the framing provides an even nailing surface. Follow the panel layout, strength-axis orientation, edge-support requirements and fastening schedule rather than choosing a thickness by habit.
APA generally recommends a 1/8-inch gap at panel edges and ends unless the panel manufacturer directs otherwise. Edge clips or blocking depend on the assembly; they are not universal substitutes for one another. Follow APA’s roof sheathing installation guidance together with your project specifications. Inspect fastening and arrange any required inspection before covering the deck.
7. Weatherproof the deck and install the covering
Use the roofing manufacturer’s complete installation instructions. Underlayment, edge metal, flashing and the roof covering form a drainage system; caulk is not a replacement for correct laps and flashing.
- Confirm the deck is suitable and sufficiently dry before covering it.
- Coordinate underlayment, eave and rake edge details so water drains outward. Their order depends on the specified system.
- Install required leak barriers and flashing at vulnerable areas, including roof-to-wall intersections and penetrations.
- Follow the covering’s exposure, overlap, fastener location and installation requirements.
- Complete compatible ridge or high-side details, vents and closures.
Underlayment is not a permanent roof. Keep exposure within the product’s limits, and do not leave unfinished flashing as a later detail. If the roof connects to another building, obtain the appropriate tie-in and flashing design.
8. Plan ventilation and check drainage
An unheated storage shed and an insulated, conditioned workshop may need different moisture-control assemblies. Decide how ventilation, air sealing and insulation work together before closing the ceiling. Do not block a designed ventilation path with insulation or cut a ridge opening unless the roof and vent system call for it.
Inspect for leaks after rain from a safe location. Check edges, flashing and penetrations, and route runoff away from the shed base and door. Persistent dampness may come from ground moisture or condensation rather than a roof leak; investigate the source before adding sealant.
Roof-building checklist before you call it finished
- The installed framing, ties, bracing and connectors match the approved design.
- Overhangs and gable ends are supported as specified.
- The sheathing and covering are correctly fastened.
- Flashing, edge details, caps and ventilation components are complete.
- Required inspections are complete and runoff drains away from the base.
- You have kept the plans, product instructions and photographs of concealed work.
Existing roof-building videos
These videos illustrate different projects and techniques. Use them for visual context, not as approval of a framing system for your site. Their dimensions, gussets, ties, connections and safety practices may not suit your design; the guidance above and your approved drawings take precedence.
Sheds For Home roof overview
Common-rafter cutting demonstration
Example of a project-specific roof assembly
Choosing plans for your shed roof
If you are still comparing shed layouts, you can explore Ryan’s Shed Plans, a paid plan collection we link to as an affiliate. Review the current offer and confirm that any selected plan includes the roof details you need. A purchased plan does not automatically satisfy local requirements or replace site-specific structural advice.
Next, review the roofing-material guide alongside the manufacturer’s instructions for your chosen covering.