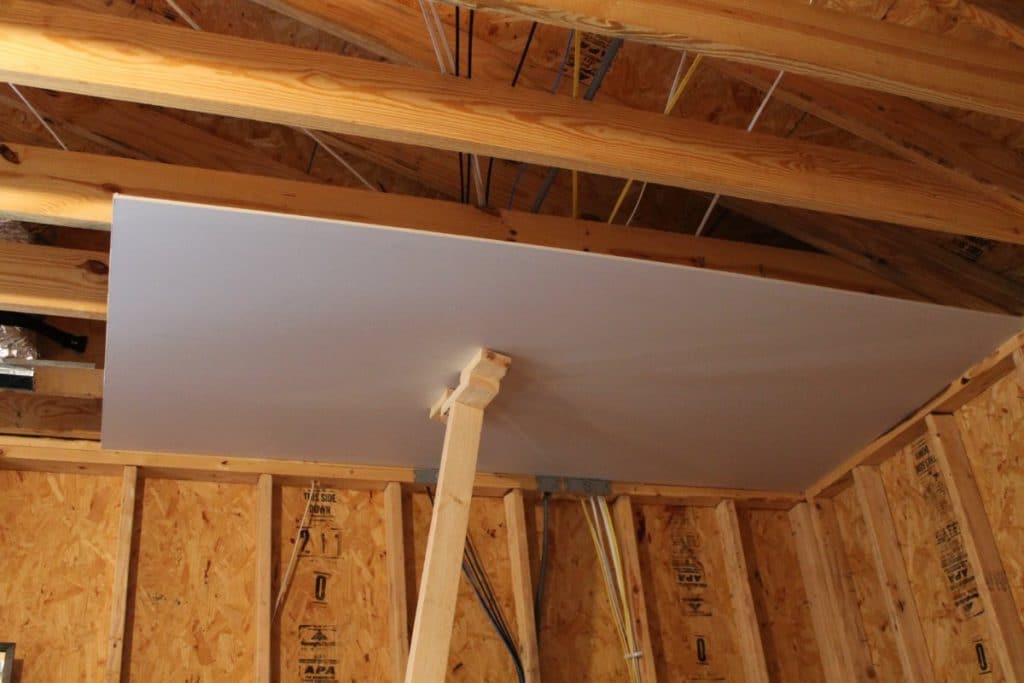
 What are the common shed ceiling styles?
There are many different styles for a shed ceiling. The most common styles are an open rafter ceiling, drywall ceiling or a wood ceiling. The shed ceiling you desire will determine the amount of work and effort required to make the shed your little oasis.
The following steps are a good start for your project.
- Decide what type of shed ceiling you want.
- Prepare the ceiling for the installation.
- Install the ceiling
- Clean up.
Type of Shed Ceilings
As noted above there are many options for your shed ceiling. The three most common ceilings are the open rafter ceiling, drywall ceiling and a wood ceiling. An open rafter ceiling is the easiest because there is no finishing as it is just the open rafters showing. The open rafter ceiling is also the most common type of ceiling for a lawn shed or a shed where you are storing equipment. If you are making your shed a little retreat, then you would want to get creative with your ceiling. This could make your shed look nice and inviting. If that is the case, then your next options would be a drywall or wood ceiling.
Preparation For Your Shed Ceiling
Preparing your shed for the ceiling project can be relatively easy if you are going to have a ceiling that is primarily an open rafter ceiling. This type of ceiling would be more along the lines of the rafters showing and then some light fixtures hanging down from the ceiling to provide light for your shed.
However, if one is going to have the shed as a retreat or home office then you might want to get creative with the ceiling. This would be either a drywall ceiling or a wood plank ceiling. Any of these ceilings will start with knowing the total square area of your shed ceiling so you can purchase the right amount of material. If you are looking at having a drywall ceiling, then you will also need to know the spacing of your rafters from your shed plans. This spacing will determine the size and type of drywall you need to buy.
Once you get the drywall and fasteners you need to install the drywall and finish the drywall to a smooth finish. However, if you are installing a wood plank ceiling then you need to know whether you want a prefabricated wood ceiling with tracks or install a tongue & groove wood ceiling fastened to the rafters. Either one will look warm and inviting.
Open Rafter Ceiling
For the open rafter ceiling one would have to build the shed to the specifications and then leave the rafters open. If one was going to have this type of shed ceiling, then installing a downrod light fixture and possible ceiling fan would be appropriate and provide some airflow as well as adequate light. It would also make the open area a little more warm and inviting even if it is for basic storage.
Drywall ceiling Installation
The drywall ceiling is very similar to what one would see inside of their home. One would have to install the drywall and then have it finished. This would provide a smooth finish that could be painted a nice ceiling white. A bright ceiling will allow an extra bit of light from the windows and better visualization within the shed. This type of ceiling would require more labor as one would have to install the dry wall and then finish the drywall by smoothing.
Selecting Drywall
There are three types of Drywall
1. Half inch for 16 inch framing
2. Five-eights inch for 24 inch framing
3. Half inch water resistant for humid areas.
Think long and hard about your shed and whether or not it will be in high humidity. This will depend on where you live. If high humidity, then choose the water resistant drywall and galvanized fasteners.
Drywall usually comes in either 4×8 or 4×12 sizes. Pick the size that fits your project and is easy to handle. If you can use the larger sheets, then you will most likely have less waste and easier clean up. However, the larger sizes are heavier and harder to handle. Estimate your square area for the shed ceiling and order the proper amount of drywall.
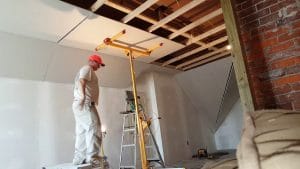
Once you have the dry wall you will need a utility knife and T-square to cut the sheets straight and to the proper length. If you are doing the job yourself, then you will want to rent a drywall lift to save you from injury, check out the video below. However, if you have some help then you can save some money on the drywall lift.
Place the drywall sheets perpendicular to the framing rafters and then tack the sheets in place with a drywall hammer. A drywall hammer is a different type of hammer then a conventional hammer as it is designed to not damage the drywall as much. Also, you do not want to install the drywall in line with the framing rafters as that will cause the drywall to sag and have “waves” between the rafters. To prevent this make sure the drywall is aligned perpendicular to the rafters.


Once the drywall is tacked in place with nails you have to use a drywall screw gun and properly fasten the drywall to the rafters. It is best to use a drywall screw gun because it is designed to place the screw in place without damaging the drywall. For the shed ceiling fasteners or screws I would recommend using galvanized fasteners as they will not corrode in high humidity and there is always a chance of humidity in an outdoor shed. Check out my post on shed mold and mildew. Once the drywall is place then you will need to make cutouts for your lights and that can be done with a spiral drywall saw or a keyhole drywall saw.
Finishing the Drywall
Find all screws that may be protruding and not screwed in all the way and take your drill and make sure the screws are fastened all the way. Do not use a hammer as that could damage the drywall further and make more of a job in finishing and smoothing the drywall.
Get a good drywall compound and using a utility knife cover the screw holes and the seams of the drywall with the compound. As you cover the areas make sure you wipe the excess with the knife so it is as smooth as possible. Once that is smooth you need to apply paper tape across the seams of the drywall and yes place more compound over the paper tape and smooth it by dragging the utility knife across the seam.
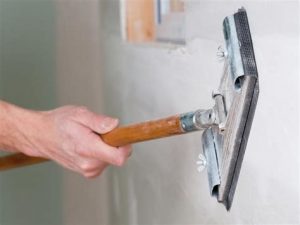
Once the compound is dry and uniformly white, then it is time to sand the drywall. Using a pole sander and a medium grit abrasive sand only the compound areas to where they are smooth. Don’t sand it too much or you will sand down to the seam tape and you will have to do the process all over.
Your next step will be to apply a second coat of compound to the seams and let dry overnight, but then sand the area this time with fine grit drywall sandpaper. Repeat this process one more time for a third coat. After the third coat is dry and smooth, then wipe the surface down with a damp cloth and the shed ceiling will now be ready for priming and painting. Check out the video below that explains drywall finishing.
Wood Ceiling Installation
A wood ceiling is a very pleasant looking ceiling and a very warm and inviting ceiling. I would recommend this type of ceiling if your shed was going to be a home office. However, it will also work for any type of shed. If you’re going to store lawn equipment then I would not look at this type of ceiling and I would probably look at an open rafter ceiling.
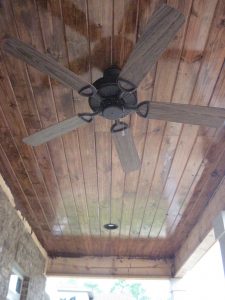 Nonetheless a wood ceiling is a very pleasant looking option and you could stain it whatever color you desire to match your shed. One could have a ceiling fan with a light fixture or even recessed lights, which would look quite nice for any type of retreat or home-office.
Prefabricated tongue and groove shed ceiling.
You will need to figure out the area of your ceiling and purchase the amount of wood paneling you will need for the project. If you are using a track system then you need to install the tracks on the framing joists. Once the tracks are in place you can start the installation of the wood paneling. As you place each board on the track you’ll place a clip on the board to hold it in place and then placed the subsequent board in the tongue and groove section and then place more clips to hold the boards in place on the ceiling. At the edges where the boards meet the wall you will need to place some trim or moulding to clean up the edges for a nice look. There is a nice video below.
Tongue & Groove Wood Planks
This type of ceiling can be installed on the rafters but perpendicular to the rafters. Depending on the length of boards this would allow you to stagger the seams. Therefore, not have all the boards join together on the same rafter. You would fasten the Wood planks directly to the rafters.
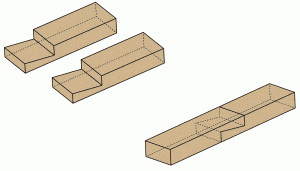 When you are joining the wood planks together it is very beneficial to add a scarf joint if they are not already cut this way. This is a type of joint where the edge of the boards are cut at a 45 degree angle. This allows them to fit close together making a nice-looking joint. When installing this type of wood plank it is a good idea to leave approximately a half an inch at the edges where the ceiling and wall meet. This would allow for board expansion and prevent buckling. Below is a video installing tongue & groove pine.
Once the boards are installed, then the next step would be to stain the boards. One could use a natural sealant or any color of stain that you would prefer to see inside the shed. As with all ceilings you have to make sure you know the location of your light fixtures and ceiling fans. You need to go back and cut them out for a proper fit.
Cleaning up
 Cleaning up from your ceiling installation could require quite a bit of work depending on the type of ceiling you installed. However there could be quite bit of dust throughout the inside of the shed. This would need to be cleaned with either a vacuum, mopping or both. You could rent a dumpster to get rid of the trash but it could be more expensive. Pick the right shed ceiling style from open rafters, to drywall ceiling to a wood ceiling. This will allow you to customize your shed to it’s purpose. Once the ceiling is installed, then you can look at a custom shed floor if desired.
I hope this helps with your decision on a shed ceiling and as always start with a good set of shed plans.
JB

