A shed kit can be a practical choice when you want predictable components, a manufacturer-defined assembly process, and less material cutting than a fully site-built shed. It is not automatically easier, cheaper, or stronger. The right decision depends on the kit, delivery access, foundation, local weather, tools, helpers, and how you plan to use the building.
These six reasons explain when a kit makes sense—and what to verify before ordering one.
1. A Kit Packages the Main Building Components
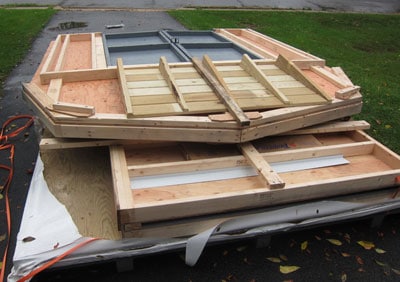
A shed kit usually groups the wall, roof, door, trim, hardware, and fastening components needed for one model. Some kits arrive as individual precut pieces; others include partially assembled wall or roof panels. The foundation, floor, shingles, anchors, paint, sealant, or fasteners may be sold separately.
Read the exact bill of materials rather than relying on a product photo. Confirm whether the kit includes:
- A floor frame and floor decking
- Roof sheathing and finished roofing
- Doors, windows, vents, and trim
- Anchors and foundation hardware
- All required fasteners and sealants
- Delivery, unloading, and placement
A complete inventory helps prevent a low advertised price from becoming a much larger project cost.
2. The Instructions Can Reduce Layout Work
A good kit provides model-specific dimensions, part labels, fastening schedules, and an assembly sequence. That can reduce the measuring and material-selection work required when building from general plans. It does not remove the need to read drawings, check for square and level, use tools safely, or correct problems as the structure goes together.
Download the instructions before buying when possible. Look for clear foundation dimensions, door-opening measurements, anchoring details, roof assembly steps, and a customer-support contact. If the manual is vague or unavailable, consider that a warning sign.
3. Kits Can Reduce Cutting and Material Waste
Precut parts may reduce on-site cutting and offcuts. Panelized kits can shorten the time the framing is exposed to weather. Packaging, pallets, damaged parts, and protective film still create waste, and some kits require field trimming or drilling.
Plan a dry staging area and check local disposal or recycling options. Keep packaging until the inventory is complete because part numbers and damage evidence may be needed for a claim.
4. You Can Compare a Defined Product
A kit gives you a named model, published dimensions, warranty terms, and a parts list to compare. Evaluate more than exterior size. Usable interior area, door clearance, wall height, roof load, wind rating, anchoring method, ventilation, and replacement-part availability can make similar-looking kits perform very differently.
Read recent owner feedback for patterns such as missing parts, difficult instructions, door alignment, leaks, corrosion, or slow replacement service. Reviews are useful clues, but the manufacturer’s current manual and written specifications should control your planning.
5. A Kit Offers Several Levels of Help
Some owners assemble a kit themselves. Others prepare the base and hire a contractor for assembly, or buy installation from the retailer. That flexibility can be useful when you can handle site preparation but not heavy panels or roof work.
Ask how many people the manufacturer requires, the estimated assembly time, the heaviest component, the tools needed, and whether lifting equipment is necessary. Do not assume that one person can safely handle large wall or roof panels. Follow the kit’s safety instructions and use appropriate fall protection and access equipment.
If a nail gun is recommended, treat it as a serious power tool. OSHA and NIOSH guidance emphasizes training, keeping hands out of the line of fire, disconnecting power before clearing jams, and using safer trigger systems. A kit’s faster assembly is not worth bypassing tool safeguards.
6. A Kit Can Make Scheduling More Predictable
Because many pieces are prepared in advance, the work may be easier to schedule than a project that requires purchasing, cutting, and sorting all lumber on site. Delivery timing, damaged parts, weather, inspections, and foundation curing can still affect the schedule.
Do not schedule helpers until the kit has arrived and you have checked the complete inventory. Store components as directed so panels do not warp and metal parts do not sit in water.
What a Shed Kit Does Not Solve
Site and foundation
The site still needs drainage, access, clearance, and a base that matches the kit. A level-looking lawn is not a foundation. Follow the manufacturer’s base dimensions and anchoring details, then compare them with local frost, soil, wind, and permit requirements. Start with our shed foundation guide.
Permits and setbacks
Permit exemptions, setbacks, easements, height limits, and homeowners-association rules vary. Check with the local authority before ordering because a nonreturnable kit may not fit the legal building area.
Wind, snow, and anchoring
Confirm the model’s published wind and snow ratings and the conditions attached to them. Ratings may depend on a specific foundation or anchor package. Small accessory structures can become windborne debris when poorly anchored. Our shed anchoring guide explains the planning questions.
Doors, ramps, and storage layout
Measure the widest and tallest item before choosing the door. A riding mower needs clearance at the deck, handles, and discharge chute—not just at the tires. Plan shelves so they do not block vents, windows, or door swing. See our shed ramp guide and organization guide.
Kit, Plans, or Professionally Built Shed?
- Choose a kit when you want a defined package, can verify its ratings and included materials, and are comfortable with the assembly or installation cost.
- Build from plans when you want more control over size, framing, openings, materials, and appearance and have the skills or qualified help to execute the design.
- Hire a builder when site conditions, structural requirements, utilities, accessibility, or project size exceed your experience.
Before buying, compare the complete installed cost: kit price, delivery, base, anchors, roofing, coatings, tools, permits, labor, tax, and disposal. That comparison is more useful than kit price alone.
Shed Kit Buying Checklist
- Confirm the exact exterior and usable interior dimensions.
- Verify door opening, wall height, roof load, wind rating, and anchoring requirements.
- Read the current manual and warranty.
- Identify everything excluded from the package.
- Price delivery, unloading, foundation, roofing, coatings, permits, and labor.
- Check replacement-part availability and return terms.
- Inspect every package for damage and missing parts before assembly.
Final Recommendation
A shed kit is most useful when its specifications match your site and you value a packaged assembly process. Do not buy solely because a listing says “easy.” Verify the base, loads, anchors, contents, tools, helpers, and total installed cost first.
If you want to compare customizable shed layouts before deciding between a kit and a site-built project, review Ryan’s Shed Plans. This is a paid affiliate recommendation, so we may earn a commission if you purchase through the link at no extra cost to you. Confirm any plan against local requirements and site conditions.