There are many options when it comes to your shed floor design. However, there are some basic steps you need to adhere to when building your shed floor. Your shed floor design will depend on your shed foundation. Read my previous post on shed foundation here. If you have a concrete foundation then that will be your floor. However, if you don’t have a concrete foundation, then you need to frame the floor. Framing the floor and the floor covering will be dependent on your foundation. Read more to check out the correct flooring with your foundation.
Shed Floor Design – Foundation
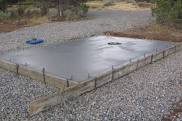
Concrete – If you have a concrete foundation then you need to make sure your design has the ability to anchor your walls to your foundation. Check out the post on how to anchor your shed to find the best options. Your floor will basically be the concrete slab and then there are many finishing options to concrete. If you are not sure how to do the concrete foundation, then read my post on concrete foundations here. You can have a smooth or rough finish. You can also have a stamped pattern to the concrete

Wooden Pier – If you do not have a concrete foundation then most likely you have a gravel, concrete block or a wooden pier foundation. If that is the case then your shed floor design will have you framing your floor on the foundation and then placing a floor covering on top of the frame. Before you frame the floor and while you are in the foundation stage it is a good idea to have a vapor barrier. The vapor barrier is a plastic covering over your foundation base that prevents moisture from getting to the shed floor and causing mold. If you are concerned about how to prevent or treat the mold, then check out shed mold & mildew post.

Shed Floor Design – Framing
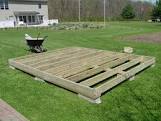
If your foundation is not concrete then you will need to frame and build your floor. Once you have your foundation level then you can start constructing your shed floor frame. The most important part of this process is to make sure your foundation is level. Once the foundation is level you will need to start the framing.
Squaring Joists – Make sure your joists are square at the ends so when you cut your joists to length then both ends will be square.
Crowning – The boards may have a bowing one way or the other and that is called the crown of the board. You want the crown or bowed side up so the weight of the shed will push the crown down and level up the boards more over time.
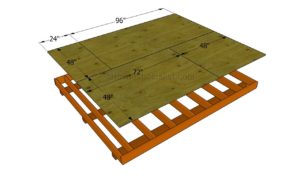
Framing – Depending on your shed plans this part can have different steps. However, the first part of the process is to build the outer frame of the shed floor and square up the joists on each end. Fasten them together with 16d galvanized nails. Then place each floor joist at 16″ apart on center and attach them to the outer frame with the same type nails.
Before securing the wooden joists completely, make sure to take measurements on a diagonal from one corner to the other. Make sure these measurements are not more than 1/8 of an inch off but as square as possible. Then attach the joists securely.
Anchoring – You will then need to attach the floor to your foundation. There are multiple ways of anchoring your floor to your foundation. However if you have a concrete pier then you can use masonry expansion bolts but you may also need to anchor with steel cable ground anchors. If you have a wooden pier then there are other options with augers and anchor wire. Read how to anchor a shed to find the best way.
Shed Floor Design – Covering
Once your floor is framed you will need to add floor covering. This will typically be plywood or OSB (oriented strand board). You will need to attach these boards where the wood fiber length is at a 90 degree angle from your floor joists to prevent sagging over time. It is a good idea to get tongue and groove boards as they make a more secure fit. Also, prior to nailing down the plywood or OSB it is a good idea to place wood glue on the joists to help secure the plywood or OSB even further to the joists. You can find good deals on OSB board that can be delivered to your house.

Shed Floor Design – Conclusion
Now that you have the basics to a shed floor design you can begin the building process. Some basic pearls are to make sure you have a good set of plans. You can find thousands of plans here and follow them accordingly.
- When framing your shed floor make sure the foundation is level.
- Make sure your outer framing is square and check diagonal measurements before securing all floor joists.
- Place the floor joists with the crown up so they will level over time from the weight of the shed and attach to the squared frame at 16″ on center with galvanized nails.
- Anchor your floor to your foundation according to your shed plans.
- Your floor covering will either be plywood or OSB and should be at 90 degree angles to the joists.
I hope this helps,
JB


