
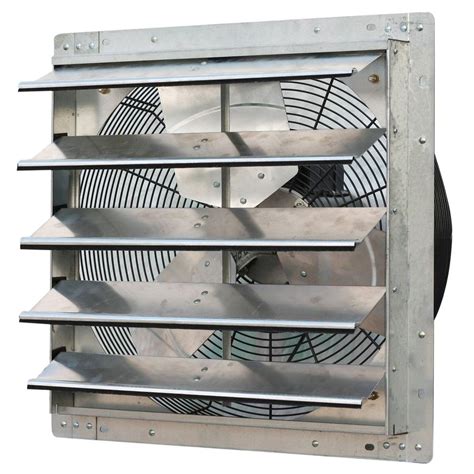
Shed ventilation works best when fresh air has a clear way in and stale air has a clear way out. For an unheated storage shed, passive vents may be a sensible starting point. An insulated workshop, a damp shed and a shed used for hazardous materials need different solutions. More vents alone will not repair a leak or make unsafe work safe.
This guide explains vent options, placement, sizing and moisture troubleshooting so you can choose a system that suits your shed. For the full building sequence, start with our shed construction guide.
Affiliate disclosure: We may earn a commission if you buy through our Ryan’s Shed Plans link, at no additional cost to you.
Start with the way you use your shed
- Unheated storage: prioritize rain protection, drainage and a dependable passive airflow path. Check whether stored tools or equipment need tighter humidity control.
- Occasional potting or hobby space: opening windows can improve comfort while you work, but they do nothing when closed.
- Heated or air-conditioned workshop: plan room ventilation, insulation, air sealing and roof moisture control together. Permanent openings through the conditioned room can waste energy and admit humid air.
- Painting, solvents or dusty woodworking: general shed ventilation is not a substitute for task-specific exposure controls.
First identify what each vent serves: the occupied room, an attic above a ceiling, or a roof air channel. These spaces are not interchangeable.
Fix water problems before adding vents

Look for roof leaks, water entering around doors and windows, ground runoff and wet equipment stored inside. Persistent musty smells, staining or corrosion are reasons to investigate, not proof that a larger fan is the answer.
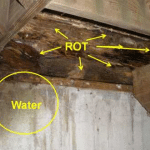
EPA guidance emphasizes controlling moisture: repair leaks and use ventilation when outside air is dry, or dehumidification when outside air is warm and humid. Opening a damp shed to muggy air may not dry it. A small humidity meter can help you compare conditions over several days, including after rain; one reading does not diagnose the source.
See the EPA’s moisture-prevention guidance. For existing damage, use our shed repair checklist and shed mold guide. Get qualified help for significant mold, soft structural wood or recurring water entry.
Passive shed ventilation: intake and exhaust
Passive ventilation relies on wind and temperature differences rather than a powered fan. A usable intake opening and an outlet are both needed. Keep storage bins, shelving and insulation from blocking the route.
Wall and gable vents
Weather-resistant wall louvers can provide cross-ventilation when arranged for the shed’s layout and wind exposure. High gable vents are another option, but two openings near the roof do not guarantee airflow through low corners. Use vent products intended for the chosen position, with appropriate pest protection and rain resistance.
The existing video below shows one gable-vent product; use the instructions for your actual model, wall and siding.
Soffit intake and ridge exhaust
A vented roof can use low intake at the eaves and high exhaust at the ridge. Maintain an unobstructed air path. Do not combine ridge vents, turbines and gable exhaust indiscriminately: air may take a short route between outlets instead of entering through the intended intake. Lomanco’s ventilation principles explain balanced intake and exhaust and avoiding mixed exhaust levels.
How much shed ventilation do you need?
Vent dimensions are not the same as usable open area. Look for the manufacturer’s net free ventilating area (NFVA), which accounts for restrictions such as louvers and screens.
For enclosed attics and roof spaces, a commonly referenced ratio is 1 square foot of net free vent area per 150 square feet of ventilated area—not one square inch. A 1:300 ratio is permitted only under applicable conditions; verify the locally adopted requirements and roof design. These ratios are not a universal fresh-air formula for an occupied shed or a method for sizing fume extraction.
Worked roof-space example: a 10 × 12-foot area is 120 square feet. At 1:150, 120 ÷ 150 = 0.8 square feet, or 115.2 square inches of total NFVA. A balanced example allocates about 57.6 square inches each to intake and exhaust; select products meeting or exceeding the required amounts and distribution. Use rated area, not the size of the cutout.
See GAF’s roof-ventilation explanation for the ratio and its conditions. Ask the building department or roof designer which approach applies before cutting openings.
Turbines, cupolas and venting skylights
Turbine roof vents
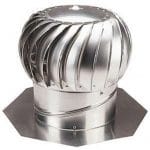
A wind-driven turbine can exhaust air without electricity, but output varies with wind, temperature and available intake. Do not treat one attic test as a guaranteed temperature drop in your shed. Choose a compatible roof pitch and flashing system and follow the manufacturer’s layout and fastening instructions.
Ventilating cupolas
A decorative cupola may not ventilate anything. A working unit needs an actual connection to the space below, weather protection and a stated usable vent area. Decorative width-to-roof-length proportions do not determine airflow. Roof opening and attachment details must match the product and structure.
Venting skylights

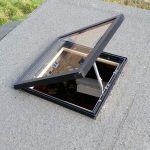
An operable skylight can release warm air and add daylight, but a fixed skylight cannot provide ventilation. Confirm the model actually opens and understand its controls; solar-powered operation does not automatically mean temperature-based opening. Consider rain, security, access and summer heat gain.
Use a skylight and flashing kit approved for the roof covering and pitch. VELUX’s installation resources provide model-specific instructions. The retained installation video is an illustration, not a universal cutting or flashing plan.
Powered fans and solar ventilation
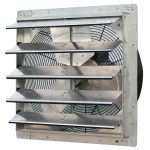
A powered exhaust fan needs enough replacement air and a clear discharge outdoors. Choose for actual airflow under installation conditions, noise, weather exposure, controls and maintenance—not shed size alone. An electrician should handle wiring where required.
Solar fans depend on available sunlight unless the product includes another power source or storage. Check whether the fan will operate at the damp or hot times you actually need it. A ceiling or desk fan mainly circulates air; it does not itself exchange indoor air with outdoors.
Consult the selected product’s manufacturer instructions and specifications before purchase or installation.
Insulated sheds need a coordinated roof design
Adding insulation changes where surfaces become cold and where condensation may occur. Do not stuff insulation into an intended ventilation channel. A vented roof assembly needs its designed air route; an unvented assembly needs a suitable moisture-control design rather than improvised blocked vents.
Room ventilation and roof ventilation remain separate decisions when a ceiling divides them. Before converting storage into an office or workshop, review local requirements for the new use and get climate-specific assembly advice. Coordinate this with shed roof construction and wall framing.
Safety: vents do not make fumes or engines safe
Never run a fuel-powered generator inside a shed, even with doors open or fans running. The CDC advises operating portable generators outdoors at least 20 feet from doors, windows and vents, with exhaust directed away from buildings. Read its generator safety guidance.
Ordinary wall fans are not automatically suitable for flammable paint or solvent vapors. Follow product labels and safety data sheets and obtain appropriate professional advice for hazardous work. OSHA’s spray-finishing standard illustrates why this work needs specialized ventilation and electrical safeguards. General airflow also does not replace dust collection at woodworking tools.
Installation and seasonal maintenance checklist
- Identify the moisture or heat problem and the space you need to ventilate.
- Choose compatible intake and exhaust products and check their rated area or airflow.
- Locate framing and wiring before cutting. Do not cut trusses or structural members without an approved design.
- Integrate flashing with the roof covering or wall drainage plane. Surface caulk alone is not a complete water-management detail.
- Follow product instructions for openings, fasteners, clearances and screens. Use qualified help for roof access and structural or electrical work.
- Inspect after heavy rain and seasonally. Clear debris, check screens and moving parts, and confirm stored items have not blocked vents.
Plan wall openings alongside shed windows and siding details so the ventilation upgrade does not create a leak.
Common shed ventilation questions
Will ventilation stop condensation under a metal roof?
It may help, but the answer depends on incoming moisture, surface temperatures and the roof assembly. Investigate leaks and ground moisture and seek compatible condensation-control details from the roofing supplier. Do not cover a recurring problem without diagnosing it.
Are two wall vents enough?
Not necessarily. Their rated open area, placement, weather conditions and connection to the space all matter. Compare the proposed layout with the design requirements instead of counting grilles.
Can I just leave a window open?
An opening window helps only while open and when conditions favor airflow. Rain, pests and security make it unreliable as the sole year-round strategy.
Plan ventilation before finishing the shed
Choose the shed’s use and roof assembly first, then coordinate openings with framing, roofing and interior storage. If you are comparing building layouts, you can explore Ryan’s Shed Plans as a paid planning resource. Check what the package includes before buying; purchased plans do not replace local approval, engineering or product-specific ventilation instructions.