How would you build a concrete shed foundation?
Find out the best way to build a concrete shed foundation by understanding how to prepare the ground for your concrete shed foundation. What is concrete and what is the best concrete for your foundation. Learn how to mix the concrete properly and finish the concrete like a professional.
It is time to build the shed you have always wanted. You made the decision to build it on a concrete shed foundation but you are unsure where to start. With the proper planning and some tips you will have the concrete foundation looking like you hired a professional.
 Before building the frame the area needs to be lined with a vapor barrier. At least a 1000 gauge polythene barrier lines the foundation area and prevents water from damaging the concrete.
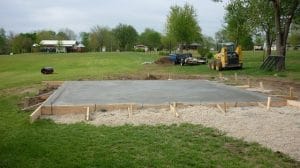
Now it’s time for the frame. This is relatively easy as you will take 2×4 or 2×6 boards and place them in the outline of your shed base. Secure the boards to one another using deck screws and wooden stakes to hold them In place, see the diagram courtesy of bobvilla.com.
 Concrete is a mix of gravel, sand, cement and water. You can purchase this with the gravel, sand and cement already premixed, such as with Quikrete or Sakrete. Other options are to buy the mixture separate and mix it entirely by yourself. However, the premix is perfect and easy for sheds.
Through a process called hydration the water activates the cement to bond the aggregate (sand and gravel) together. Some concrete mixtures have polymers added to allow for quicker times for curing and resist cracking.
 Now that you know you are going to build a concrete shed foundation you need to find out how much concrete to use. A quick calculation used from family Handyman: “Calculate the volume you need in cubic yards. Multiply the length (10 ft.) by the width (10 ft.) by the depth (.35 ft., or 4 in.) and divide it by 27 (the number of cubic feet in a cubic yard). You get 1.3 cu. yds. Then add 10 percent to allow for spillage and slab depth variations to help determine the concrete cost per yard.” Another options is a calculator found here.
If you are using Quikrete they have a calculator here to give you an estimate for how many bags you will need to use for the project. Sakrete has the same type of calculators for their products here.
Concrete Shed Foundation – Prepare The Ground
Step One
The first thing you will need to do is find the proper area for you to build your shed. This will be determined by your landscape as well as the type of shed you’re going to build. Make sure you have the proper permits for the building process. You can find more about your permits here. Once you have the correct plans and the correct area for your shed you will need to begin the preparation for the foundation. If your ground has a lot of rock and plant roots then you will need to remove those from the soil. You want to make sure the soil is firm and not soft.Step Two
The next part of the process would be to dig the ground to the dimensions of your shed. For example, if the shed is going to be 10 x 10 then you need to dig out a 10 x 10 area in the ground. The typical depth will be 7 inches. The first 3 inches will be for the gravel base and the remaining 4 inches will be for the concrete. However, it can also be at a depth of 8 inches. This would be for 4 inches of gravel and 4 inches of concrete. Now that you dug the area to the proper depth according to the dimensions of your shed plan, you will need to first tamp down the soil to make sure it forms a firm base. True Temper has a great handheld tamper and Wen has a great powered tamper with great reviews. Before building the frame the area needs to be lined with a vapor barrier. At least a 1000 gauge polythene barrier lines the foundation area and prevents water from damaging the concrete.
Now it’s time for the frame. This is relatively easy as you will take 2×4 or 2×6 boards and place them in the outline of your shed base. Secure the boards to one another using deck screws and wooden stakes to hold them In place, see the diagram courtesy of bobvilla.com.
Step Three
Once the frame is in place around the area for the foundation one will need to make sure that the frame is of the proper dimensions. Measure the frame from corner to corner both length wise and width wise. You want to make sure that the dimensions are even both ways. Then measure diagonally from corner to corner and make sure those measurements are accurate. Also, use a level across the top of the board framing to make sure the poured concrete will be level. Once these are complete and the measurements are correct, then you can prepare the soil.Step Four
Before pouring concrete you will need to first place sand on the vapor barrier to prevent it from being punctured by grave. Next, you will fill the hole with 3 inches of gravel (or 4 inches if that is what you decided on). Most contractors use type 2 or 3 gravel and Quikrete has an all purpose gravel mix. Tamping the gravel will make a firm base for the next step. Once this is done you are ready to move on to the concrete.Concrete Shed Foundation – What is Concrete?
 Concrete is a mix of gravel, sand, cement and water. You can purchase this with the gravel, sand and cement already premixed, such as with Quikrete or Sakrete. Other options are to buy the mixture separate and mix it entirely by yourself. However, the premix is perfect and easy for sheds.
Through a process called hydration the water activates the cement to bond the aggregate (sand and gravel) together. Some concrete mixtures have polymers added to allow for quicker times for curing and resist cracking.
PSI Rating
Concrete will also have a PSI rating which is a pressure per square inch rating. Depending on the contents of your shed you will want to find the right concrete mixture with the right PSI rating for what you are going to use for your shed. I typically recommend a high psi.Concrete Shed Foundation – How Much Do I Need?
 Now that you know you are going to build a concrete shed foundation you need to find out how much concrete to use. A quick calculation used from family Handyman: “Calculate the volume you need in cubic yards. Multiply the length (10 ft.) by the width (10 ft.) by the depth (.35 ft., or 4 in.) and divide it by 27 (the number of cubic feet in a cubic yard). You get 1.3 cu. yds. Then add 10 percent to allow for spillage and slab depth variations to help determine the concrete cost per yard.” Another options is a calculator found here.
If you are using Quikrete they have a calculator here to give you an estimate for how many bags you will need to use for the project. Sakrete has the same type of calculators for their products here.


