
Helping You Get That Perfect Shed

What Is A Vapor Barrier For A Shed?

Spread the love

A vapor barrier for a shed is a low-permeance material that limits water-vapor diffusion. Whether you need one—and where it belongs—depends on the foundation, climate, heating or cooling, and the other layers in the building. It is not a universal sheet of plastic to install behind every wall.

Start by identifying the moisture source. Rain leaks, ground moisture, humid air and condensation require different controls. This guide explains those differences so you can plan a shed that resists wetting and can dry when it gets wet.

Affiliate disclosure: We may earn a commission if you buy through our Ryan’s Shed Plans link, at no additional cost to you.

Roll of sheet membrane

Vapor barriers, air barriers and rain protection are different

  • Vapor retarder: limits water vapor moving through materials by diffusion. “Vapor barrier” usually describes the least vapor-permeable class.
  • Air barrier: limits air leakage through an assembly. It must be continuous and sealed at joints and penetrations.
  • Water-resistive barrier and flashing: manage rain that gets behind siding and direct it outward.
  • Capillary break: interrupts liquid-water movement through contacting porous materials, such as concrete and timber.

A product can serve more than one role when installed as a complete system, but the names are not interchangeable. For example, DuPont’s weather-barrier guidance explains how housewrap can resist air and bulk water while allowing vapor movement.

Fix drainage and leaks before adding a membrane. The EPA moisture-control guide provides broader design and maintenance principles. A vapor barrier cannot compensate for water entering a doorway or a leaking roof.
Vapor-retarder classes and product ratings

Vapor-retarder classes describe tested vapor permeance in U.S. perms. Lower numbers mean less vapor passes through the material under the test conditions.

  • Class I: 0.1 perm or less.
  • Class II: greater than 0.1 and up to 1.0 perm.
  • Class III: greater than 1.0 and up to 10 perms.

Polyethylene sheet is commonly Class I. Facings, coatings and membranes have product-specific ratings; do not assume every paint or faced batt belongs to the same class. Thickness alone does not describe puncture resistance, seam performance or suitability for a particular use.

The PNNL-hosted moisture-control reference explains these classifications. Check the actual product data and locally adopted requirements rather than buying by a generic “plastic” label.

Shed walls: climate and drying potential

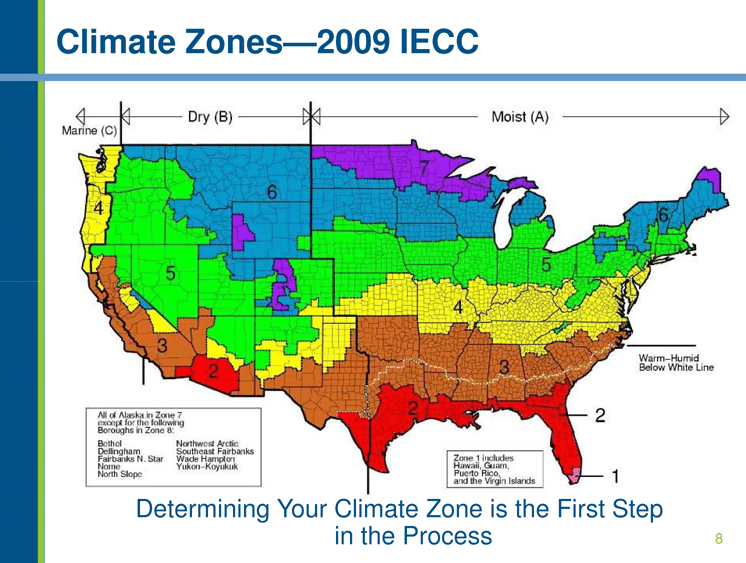
The older climate map above is background information, not a current specification for your shed. Confirm the climate zone and construction requirements used by your local authority.

An unheated storage shed does not automatically need an interior plastic wall lining. A heated or air-conditioned workspace needs a coordinated wall design, but that does not automatically mean a Class I barrier.

In cold conditions, indoor moisture moving toward cold exterior layers can cause problems. In hot-humid climates, an interior low-permeance layer in an air-conditioned building can obstruct inward drying. Mixed climates and seasonal use require particular care. The Building Science Corporation vapor-control recommendations show why climate and assembly matter; their historical guidance should be read alongside current local requirements.

Have the whole assembly reviewed: siding, drainage space, sheathing, exterior insulation, cavity insulation, facings and interior finish. Avoid adding a second low-permeance layer that leaves timber or sheathing with little drying potential. Variable-permeance membranes may be an option in some designs, not a universal cure.

Coordinate with our wall-framing guide and siding guide.

Vapor control beneath shed foundations

Gravel bases and ground covers

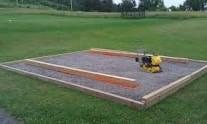
An open gravel pad beneath a raised shed is not the same as an enclosed crawlspace. Its main jobs include stable support and drainage. Do not automatically line every gravel excavation with impermeable plastic: a poorly detailed liner can retain water instead of solving the site’s drainage problem.

A permeable separation geotextile and a vapor barrier perform different jobs. Select the foundation layers for the actual soil, runoff and shed design. See our gravel shed base guide.

If ground vapor is contributing to dampness, ask a local professional whether a designed ground-cover system is appropriate and how it should be protected, drained and terminated. An enclosed crawlspace also needs a complete moisture-control approach, not plastic alone.

Keep timber out of persistent wetting, use treatment appropriate to its exposure and maintain the specified clearances. Ground cover is not a substitute for drainage or sound wood.

Concrete slabs and sill details

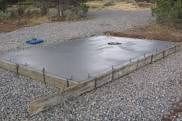
For a new concrete floor, plan vapor control before the pour. A purpose-made below-slab membrane is commonly placed directly beneath the concrete over the prepared base or insulation as detailed by the designer. Do not assume it belongs underneath all the gravel.

Choose a product suitable for below-slab exposure, including handling and puncture resistance. Follow its instructions for overlaps, compatible tape, pipe penetrations, perimeter seals and repairs. There is no single overlap or excavation depth that fits every foundation.

For a manufacturer example, consult StegoHome’s below-slab installation instructions. Protect the membrane from damage during reinforcement placement and concrete work, and inspect before it is concealed.

Use the designed capillary break beneath timber bearing on concrete and compatible framing materials. Do not assume every sill gasket is a complete vapor-control system. For an existing slab, investigate moisture and flooring requirements before adding a surface coating or an insulated floor; a retrofit cannot simply reproduce an inaccessible under-slab layer.

Read our concrete foundation guide and floor insulation guide for related planning decisions.

Shed roofs, ceilings and ventilation

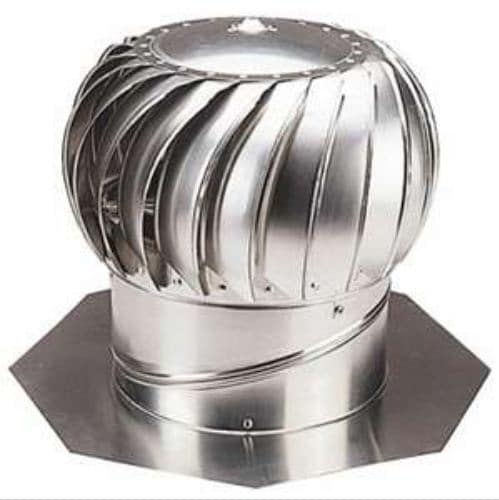
turbine vent

Roof ventilation and vapor control are connected but different. A vented attic needs its designed intake and exhaust path; an unvented roof requires a suitable moisture-control assembly. Not every roof should be opened up or every cavity filled with insulation.

When a ceiling separates a heated room from an attic, plan its air sealing, insulation and vapor-control layer together. Ordinary latex paint is not automatically a Class I vapor barrier, and a coat of paint does not seal gaps around cables, lights or ceiling edges.

Ventilation also does not guarantee dryness. In warm, humid weather, outdoor air can add moisture; in other conditions it can help drying. Fix leaks and identify the source before installing a bigger fan.

Use our updated shed ventilation guide and roof construction guide to coordinate the roof and room. Get climate-specific advice before converting storage into a conditioned workspace.

Vapor-control video: background, not a specification

The existing Matt Risinger video below discusses vapor control in buildings generally. Use it as background, not a shed-specific installation plan. Verify any example against your climate, materials, intended use and current local requirements.

Vapor-barrier FAQs and installation checklist

Does every shed need plastic in its walls?

No. The appropriate vapor control depends on the complete assembly and how the shed is used. Adding plastic without a design can prevent drying.

Is housewrap a vapor barrier?

Not necessarily. Many housewraps are deliberately vapor-permeable while managing rain and air leakage. Read the exact product rating and installation instructions.

Will a vapor barrier stop mold?

Not by itself. Identify water entry, humidity and cold surfaces. Do not seal wet or damaged materials behind new layers. Significant mold or decay warrants qualified assessment.

What should I check before closing walls or floors?

  1. Confirm the shed’s use, climate and local requirements.
  2. Inspect and repair leaks, drainage defects and damaged materials.
  3. Identify the intended water, air, vapor and thermal-control layers.
  4. Check material compatibility and the assembly’s drying direction.
  5. Inspect seams, penetrations and damaged areas before covering them.
  6. Keep product instructions and photos of concealed work for maintenance.

Start with our complete shed construction guide to coordinate these decisions. For layout ideas, you can explore Ryan’s Shed Plans as a paid resource. Check the package contents before buying; purchased plans do not replace a moisture-control design, engineering or local approval.

error: Content is protected !!
Verified by MonsterInsights