
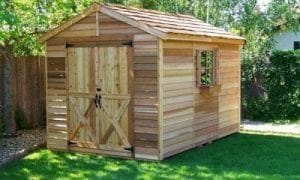
The best shed upgrades solve a real problem: safer access, better moisture control, more useful storage, or a space that is comfortable for its intended purpose. Before buying accessories, decide how the shed will be used and correct any roof, foundation, drainage, or structural problems first.
The twelve ideas below work for many storage, garden, workshop, and hobby sheds. Not every upgrade belongs in every building, so choose improvements that fit the shed’s structure, local climate, and the people who will use it.
Plan Upgrades in the Right Order
Start with the building envelope and site. Water entering through a roof, wall, door, or poorly drained foundation will damage finishes and stored items. Next, plan ventilation, safe access, and electrical needs. Shelving, lighting, and decorative features come after the shed is dry, stable, and secure.
1. Improve Ventilation
Ventilation helps remove trapped heat and moisture, but the right approach depends on the building. A storage shed may use passive high-and-low vents. An occupied workshop may need deliberately sized mechanical ventilation and make-up air. A fan that only recirculates air does not remove moisture or fumes.
Do not rely on a small consumer fan for painting, fuel storage, or other hazardous vapors. Follow product safety information and local requirements. Read our shed ventilation guide before cutting openings in walls or roofs.
2. Add Gutters and Manage Runoff
Gutters can keep roof runoff away from the entrance and foundation. Size and support them for the roof area and local rainfall, direct downspouts to a stable discharge point, and make sure water does not create erosion or a neighbor problem. A rain barrel needs a covered inlet, stable base, overflow route, and local-rule check.
See our shed guttering guide for planning details.
3. Build a Safer Ramp
A ramp is useful for mowers, carts, and wheeled tools. Measure the total rise, door clearance, equipment width, and turning space. Provide a firm, slip-resistant surface, secure edges, and a level transition at the doorway. The steeper the ramp, the harder it is to control heavy equipment.
If the ramp is intended as an accessible route, it may need to meet specific slope, landing, width, handrail, and edge-protection requirements. Use the applicable code rather than treating a mower ramp as an accessibility ramp. Our shed ramp guide covers the construction sequence.
4. Upgrade Doors and Hardware
Doors should open without dragging, close squarely, and shed water away from the opening. Check the frame and threshold before adding heavier hardware. A wider or double-door opening can improve equipment access, but changing an opening can affect structural framing.
Choose hinges, fasteners, latches, and locks that fit the door material and exposure. For planning and hardware considerations, see our single shed door guide and shed lock-bar guide.
5. Add Daylight With Windows
Windows make a shed more pleasant to use and can provide ventilation, but they also affect privacy, security, weather resistance, and wall framing. Place windows around the work surface and storage layout instead of choosing a location only for exterior appearance.
Use proper headers, flashing, sealants, and manufacturer installation instructions. Smaller high windows may provide daylight while limiting direct views of stored equipment. Compare options in our shed window guide and transom window guide.
6. Install Useful Lighting
Begin with the tasks you need to see. General lighting helps with storage, while a workbench benefits from separate task lighting. Lumens describe light output; watts describe power use. Fixture placement and glare control matter as much as the number printed on the package.
Battery or standalone solar lights may suit occasional use. Permanent wiring should follow electrical rules and use equipment suitable for the location. Do not use an extension cord as permanent wiring. Our shed lighting guide compares the main options.
7. Control Heat, Cold, and Condensation
Insulation can improve comfort, but it must be part of an assembly that manages air leakage, vapor, and drying. Adding insulation without stopping roof leaks or planning ventilation can hide moisture problems. Reflective coatings and paint additives are not substitutes for a correctly designed insulation system.
For an occupied, heated, or cooled shed, get climate-specific guidance for walls, ceiling, floor, and ventilation. Start with our shed insulation guide.
8. Build Shelving Around Real Loads
Inventory what you will store before buying shelves. Keep frequently used items between knee and shoulder height, heavy items low, and hazardous products in their original containers according to label directions. Maintain clear access to doors, vents, electrical panels, and windows.
Wall-mounted shelving is only as strong as its anchors and the framing behind it. Freestanding units should sit level and may need restraint against tipping. Use our shed organization guide to create zones before installing storage.
9. Add a Durable Workbench
A workbench turns unused wall space into a repair, gardening, or woodworking station. Choose the height for the user and task, allow room for a vise or tool clearance, and anchor the bench where required. Keep heat-producing tools and battery charging away from combustibles and follow each product’s instructions.
10. Address Moisture and Mold at the Source
A dehumidifier may help in an enclosed powered shed, but it will not repair a leak, poor drainage, or uncontrolled outdoor-air entry. Inspect the roof, siding, door threshold, foundation, and stored wet equipment. The U.S. Environmental Protection Agency emphasizes that moisture control is the key to mold control.
Our shed mold guide explains what to inspect and when damaged material may need removal.
11. Improve the Surrounding Grade and Landscaping
Landscaping should improve appearance without holding moisture against siding or blocking airflow. Maintain clearance for inspection and painting, keep soil and mulch below vulnerable wall materials, and slope surface water away from the base. Avoid planting roots where they may disturb the foundation or drainage route.
12. Add a Landing, Porch, or Deck Carefully
A small landing can make the entrance easier to use and keep mud out. A larger porch or deck may require footings, guards, stairs, permits, and a connection that does not trap water against the shed. Do not hang a heavy deck from a light shed wall unless the structure was designed for that load; an independently supported platform is often easier to evaluate.
Which Shed Upgrades Should Come First?
- Stop leaks and correct drainage or foundation movement.
- Make doors, steps, ramps, and walking surfaces safe.
- Plan ventilation, power, and moisture control.
- Add storage and task surfaces.
- Finish with windows, trim, flower boxes, and landscaping.
If you are still planning the building, it is usually easier to include openings, framing, wiring routes, and storage zones before construction. You can compare layouts in Ryan’s Shed Plans. This is a paid affiliate recommendation, so we may earn a commission if you buy through the link at no extra cost to you. Confirm any plan against local code, site conditions, and manufacturer requirements.