Introduction
If you’ve been thinking about adding a shed to your backyard, you’ve probably come across hundreds of options—from prefabricated resin models to metal storage kits. But nothing quite matches the durability, charm, and versatility of a wooden structure. That’s where wood yard shed plans come in. With the right plans, you can create a functional, long-lasting, and aesthetically pleasing shed that fits your exact storage needs while also enhancing your property’s value.
In this in-depth guide, we’ll cover everything you need to know before breaking ground on your project. From choosing the right design, foundation type, and roofing style, to planning interior storage and adding finishing touches, this resource will walk you step-by-step through the entire process. Whether you’re a DIY novice or an experienced builder, the goal is to give you clarity and confidence so you can start your project right—and finish it strong.
Why Choose Wood Over Other Materials?
When considering sheds, you’ll find plenty of options on the market: metal, resin, vinyl, and even fabric storage units. But wooden sheds remain the gold standard for several reasons:
Durability – Properly maintained wood sheds can last decades, resisting harsh weather, pests, and wear.
Customizability – Wood is easy to cut, paint, stain, and modify. This means you can design the shed to match your home, add windows, shelving, or even electricity.
Aesthetics – Few materials blend with a natural landscape as well as wood. A painted or stained shed enhances curb appeal.
Repairability – Unlike resin or metal, wooden structures can be repaired relatively easily if damaged.
For homeowners who want something both functional and attractive, wood is often the clear winner.
Step 1: Define the Purpose of Your Shed
Before looking at specific wood yard shed plans, ask yourself: What will this structure primarily be used for?
Tool Storage – A compact shed with pegboards and shelving is sufficient.
Lawn Equipment – You’ll need double doors for easy mower or wheelbarrow access.
Workshop – Consider larger dimensions, added ventilation, and electricity.
Garden Hub – You may want a potting bench, skylight, and water access.
Multi-Use – Families often design sheds with flexible layouts for tools, bikes, and seasonal décor.
Having a clear purpose in mind shapes everything else: size, location, and internal organization.
Step 2: Check Local Codes and HOA Rules
Nothing derails a backyard project faster than running into permit issues. Many municipalities regulate outbuildings through:
Setback requirements (distance from property lines)
Maximum square footage (often under 200 sq. ft. before a permit is required)
Height restrictions (especially in neighborhoods with HOAs)
Foundation standards (to prevent flooding or shifting)
Do this research early, before purchasing wood yard shed plans, materials or breaking ground.
Step 3: Choosing the Right Size

A shed that’s too small will quickly become cluttered. A shed that’s too large may overwhelm your yard—or cost more than you need to spend. Here’s a quick size breakdown:
Small (6×8, 8×8) – Good for tools, bikes, and lightweight storage.
Medium (10×12, 12×12) – Best for lawn mowers, snow blowers, or multiple uses.
Large (12×16, 14×20) – Ideal for workshops, hobby rooms, or combination storage.
Pro tip: Make a list of what you’ll store inside. Then measure the biggest item (like a riding mower) to ensure the doors and layout will accommodate it.
Step 4: Selecting the Right Foundation
Every strong shed starts with a solid foundation. Options include:
Gravel Pad with Timber Frame – Budget-friendly and effective for drainage.
Concrete Slab – Best for heavy loads or permanent workshops.
Deck Blocks – Quick installation for small sheds.
Piers or Posts – Elevates shed in flood-prone areas.
For most DIYers, a gravel pad offers the best balance between cost and performance. Check out which shed foundation is best for you.
Step 5: Explore Different Styles of Wood Yard Shed Plans
Not all sheds are created equal. The style you choose affects both function and curb appeal.
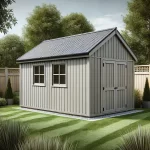
Gable Roof Shed – Classic triangular roof, versatile and easy to build.
Lean-To Shed – Simple, space-saving, and perfect against a wall or fence.
Barn-Style (Gambrel) – Offers extra loft space for storage.
Saltbox – Unique sloping roof design, great for traditional homes.
Modern Flat Roof – Clean, contemporary lines for newer properties.
Look for shed plans that provide detailed diagrams, a full material list, and clear instructions.
Step 6: Essential Tools and Materials
 Before starting construction, make sure you have the right tools and materials.
Basic Tools:
Circular saw or miter saw
Hammer or nail gun
Drill and bits
Tape measure and square
Level
Safety gear (gloves, goggles, ear protection)
Materials:
Pressure-treated lumber for the base
Framing lumber (2x4s, 2x6s)
Plywood or OSB sheathing
Roofing materials (shingles or metal panels)
Siding (T1-11, lap siding, or cedar planks)
Hardware (hinges, screws, nails, door handles)
- Amazon has a great selection of tools here.
Step 7: Framing and Construction Basics
Lay the Foundation – Build a level base using gravel and treated timbers.
Frame the Floor – Use joists to create a sturdy floor system, then cover with plywood.
Construct the Walls – Assemble wall panels flat, then raise them into place.
Add the Roof Structure – Cut rafters or trusses, install, then cover with sheathing.
Install Siding and Roofing – Weatherproof the structure with your chosen exterior.
Add Doors and Windows – Customize to improve light and accessibility.
Step 8: Organizing the Interior
A shed without organization quickly becomes a dumping ground. Consider these storage solutions:
Pegboards for hanging tools
Open shelving for bins and boxes
Loft storage in barns or gambrel roofs
Hooks and racks for bikes, hoses, or ladders
Workbenches for potting or repairs
Plan your interior layout at the same time you review shed blueprints.
Step 9: Finishing Touches
This is where you transform a basic storage unit into a backyard highlight.
Paint or Stain – Protects wood while matching your home’s style.
Landscaping – Add shrubs, flower beds, or gravel paths.
Trim and Shutters – Elevates aesthetics and makes the shed look like a small cottage.
Lighting – Solar or electric fixtures for evening access.
Security – Deadbolts or smart locks for peace of mind.
Finding the Best Wood Yard Shed Plans
Not all plans are equal. When shopping online or in hardware stores, evaluate:
Clarity – Look for diagrams, step-by-step photos, and cut lists.
Detail Level – Plans should specify lumber grades, fastener types, and exact dimensions.
Reviews – User feedback often reveals if plans are beginner-friendly.
Adaptability – Good plans allow for modifications, like adding windows or extending roof overhangs.
Step 10: Maintenance for Long-Term Durability
Building your shed is only half the journey. Proper care ensures it lasts decades.
Annual Inspection – Check for leaks, rot, or pests.
Repainting/Staining – Every 3–5 years to maintain water resistance.
Roof Care – Replace damaged shingles promptly.
Foundation Upkeep – Ensure gravel pads drain properly and concrete doesn’t crack.
Ventilation – Keep airflow steady to reduce mold and condensation.
Common Mistakes to Avoid
Even experienced DIYers can run into issues. Watch out for these pitfalls:
Skipping the Foundation – A shed built directly on soil will quickly rot.
Underestimating Size – Always build larger than you think you’ll need.
Ignoring Ventilation – Trapped moisture ruins tools and wood alike.
Using Untreated Wood at Ground Level – Increases risk of rot and termites.
Not Following Local Regulations – Could mean tearing down your shed after it’s built.
Cost Breakdown: What to Expect
Shed costs vary based on size, design, and materials. Rough estimates:
Small (8×8) – $800–$1,500
Medium (10×12) – $1,500–$3,000
Large (12×16 or bigger) – $3,000–$6,000+
DIY construction typically saves 30–50% compared to buying prebuilt sheds.
Sustainability Considerations
If eco-friendly building is important to you, consider:
Reclaimed Lumber – Saves money and reduces waste.
Metal Roofing – Longer life span and recyclable.
Natural Stains – Plant-based oils instead of harsh chemicals.
Rainwater Harvesting – Add gutters and a barrel to support garden watering.
Conclusion – Wood Yard Shed Plans
Building a shed is more than just creating storage—it’s about designing a space that supports your lifestyle, adds value to your property, and reflects your creativity. By choosing high-quality wood yard shed plans, preparing carefully, and following best practices, you can create a structure that lasts for decades.
From the foundation under your feet to the final coat of paint, every choice contributes to a shed that isn’t just functional, but also a proud extension of your home. Whether you’re storing garden tools, starting a backyard workshop, or building a rustic retreat, your shed project begins with the right plan—and ends with a space you’ll enjoy using every season.


