These top 6 Shed repairs can be a problem unless you know how to fix them. The top 6 repairs have to deal with the ramp, door, window, shed siding, floor, and roof. Learn how to do these shed repairs and your shed will last a long time.
Shed Repairs – Ramp Repair
There are many ways that a shed ramp can break. This includes problems with the foundation or the boards. The ramp is susceptible for damage because it is in direct contact with the ground which can cause the boards to warp or rot. Further, the ramp holds a lot of weight by moving equipment up and down the ramp. The combination of these two things can cause the ramp to fail. So learn how to fix the shed ramp when this happens.
Check The Foundation
Check the ground and see if there is an issue with your foundation. If your ramp boards are placed directly on the ground, then check the water content of your ground. The ground can be very wet and if that is the case we have to fix this problem. I would recommend removing the ramp and building a new ramp on a gravel foundation if it is too wet.
If there is a lot of water around the shed ramp, then fix the water issue first. One may need to dig a french drain around the area to funnel water away from the foundation. However, most areas are not that wet and building a gravel foundation without the french drain can fix the issue.
The area for the ramp foundation will need to be cleared, cleaned and leveled. Then one would need to tamp down the area with a self tamper. I like the one by Ames. This is a great tamper that you can use for many projects and you can read about it here and check it out on Amazon.
Once the area is tamped then place gravel in the foundation area. Once the gravel is in the foundation area it will need to be tamped down again to make it stable and level. Now rebuild the ramp with the proper gravel foundation. You can check out the video below or read my post on shed ramps here. Also, if you are unsure about the gravel foundation then read my previous post on gravel foundations here.
Replace The Ramp Boards
Your ramp foundation is intact and the shed ramp framing is good also. However, the boards of the ramp are getting weak. This could be plywood boards or other boards that have become weak over the years. This is the easiest one to fix.
Take the old weak boards off of the ramp foundation. Then get the same type of boards with the same cut dimensions. Now fasten those boards to the ramp foundation with galvanized screws and you have repaired your shed ramp.
However, if the shed ramp frame is ruined, then you have to build a new shed ramp with the same dimensions. I found this nice video of a shed ramp being built. Once it is built, then you have to attach it to the shed. However, make sure you fix the foundation before building another ramp. Otherwise you will have to do this repair again sooner rather than later.
Shed Repairs – Door Repair
The doorway into the shed is one of the most vital parts of the shed. It protects the contents of your shed. It allows you to enter and exit the shed. The right doorway can even allow you to drive into the shed if you are storing equipment. That is why you need to repair this part of your shed fast when it goes bad.
Hinges
Over time the hinges can become loose. If that is the case, then take out the old screws and install new screws. That is pretty simple. Make sure you go one hinge at a time and make sure the door does not fall or move too much before installing the new screws. However, if the hinges are broken that is a different story.
Broken hinges will need to be replaced. However, you may want to replace all the hinges so that it looks uniform. My recommendation is to replace one hinge at at time so you do not need to take the entire door off of the hinges. By going one hinge at a time it makes the job easy enough for one person to do this without much help.
Install A New Door
If the door is completely messed up and needs to be removed, then remove the door and get a new door. Measure the door height and width and make sure the dimensions are correct.
The doorway needs to be level after you remove the old door. Make sure you level the doorway if it is not level. Place the door in the doorway where it will be installed and make sure it fits appropriately and is level.
If there are some issues with the door level, then make sure you use the right wood shims to make it level. After the door is in place and leveled with the shims, then secure the door to the frame.
There are times that once the door is installed you can still have issues where the door opens and closes and hits the frame. If that is the case, then get hinge shims. These shims attach at the door hinge and can level the door so it opens and closes smoothly. I like the ones by EZ-SHIM and you can read more about them here.
I found this great video that explains the entire door installation process.
Shed Repairs – Window Repairs
Not all sheds have windows but if it does then there are some repairs that may need to be done. There comes a time when the window has lost its seal and needs to be caulked. A window pane may break and need to be replaced and sometimes you have to replace the entire window. These are easy things to repair.
Broken Seal
As sheds get up there in age the seal can become weak over time. If that is the case, then you will see the caulk start to peel away. One may also realize that the window is leaking. Either way the first step is to find the caulk that is ruined and find the leak.
Use your utility knife and strip away the old caulk and then install the new caulk. You may need to tape the edges of the window and frame so the excess caulk does not get all over the window or the frame.
The tools required would be a utility caulk knife like the one we use from Bates. Also, you want to make sure you use a good outdoor caulk that will last a long time like the one by GE.
Broken Window Pane
Most sheds are built for storage and some are built for doing chores and tasks. There are times where an accident can happen and something breaks a window pane. This is an easy fix and can be done with the right tools.
Below is a nice video on how this is accomplished. I would be very careful though as removing broken glass can be dangerous because you can cut yourself quite easily. However, this is a task that you can do with the proper planning.
Replace A Window
There are times when the entire window has to be removed and a new one installed. Here is a nice video explaining the process. Once the window is removed you will need to clean the framed area and caulk around the edges. It is a good idea to spray foam insulation around the frame also.
Now install the window in the frame and fasten the window in position. Reseal the window again with caulk. Once the window is installed then reinstall the window trim. The video below has to do with a bathroom window, but the same step wise approach applies to a shed window.
Shed Repairs – Siding Repair
Some sheds are built with siding and there are times when the siding will get damaged. Knowing how to repair the siding could save you some money. It is a relatively easy task to complete and can be done in a day.
Siding Removal
Siding pieces are attached to one another by channels. When you have a damaged piece of siding you need to detach the bad siding from the good siding by pulling it apart. Once you pull the bad siding apart from the good siding it will expose the nails that hold the bad piece of siding in place. Remove those nails which will allow you to remove the bad piece of siding from the wall. Watch the video below.
Siding Installation
Get your new piece of siding and place it on the exterior wall and snap it into place with the existing good siding. Once attached to the channels you can move it left and right to make sure there is an overlap with the existing siding so there are no gaps.
Nail the siding into place but do not nail it too tight as the siding will need a little room for expansion. You may need to use a zip tool to make sure the new siding attaches to the old siding. You can read more about a zip tool here. This is a great video showing this entire process.
Shed Repairs – Floor Repair
Another area of the shed that may need repair at times is the floor. If you have a shed long enough, the floor may warp or need to be repaired at some point. This can be very simple or very difficult depending on the type of shed floor.
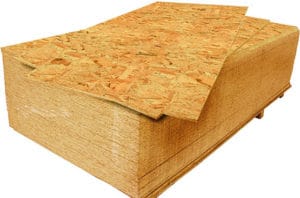
Most floors will be made of Plywood or OSB. When you notice the floor damage, then you need to remove the old boards and install new boards. First thing to do is remove the contents of the shed that are resting on the floor. Once that area is exposed then measure the board that needs to be replaced and get a new board and cut it to the same size.

Now you need to remove the old board and place the new board in its place and fasten it to the floor joists. Once fastened then move your stuff right back into place. Pretty easy stuff.
On the other hand if your shed is a man cave or a retreat then your floor may be a custom floor. It could be tile, hardwood, or some other type of flooring. Explaining each of these floor options are a bit much for this post but you can look at my previous post on shed flooring. Also check out this book on Floor Repair on Amazon.
Shed Repairs – Roofing Repair
Most sheds have a shingled roof. These roofs can become damaged from the wind and outdoor elements. Over time shingles will need to be replaced. Find the shingles that need to be replaced and make sure you get the same shingles for the repair. You do not want two different types of shingles on the roof.
Shingle Removal
Find the shingles that need to be replaced and remove the nails that are holding the shingles in place. These nails are typically two shingles above the shingle you are removing. You will need to use a roof snake tool which will make the process easier. Check out the video below to see this in action.
Shingle Installation
Once these shingles are removed you will need to install the new shingles in their place. The new shingle needs to be placed in line with the remaining shingles so they are even. After the shingles are in line then nail it down about an inch from the top of the shingle. This is a nice video illustrating exactly how to do this entire process.
Shed Repairs – Conclusion
There are many repairs that may need to be done to a shed over time. I tackled just the top 6 shed repairs that we often encounter. These include the ramp, door, window, siding, floor and roof. I hope the article gives you a basic understanding of these shed repairs. Once you can master these repairs you can repair the most common problems with your shed or your home.
All The Best,
JB


